MICROBIT - WIFI example with iot:bit
[html]
Connecting WIFI example for microbit with iot:bit module
- Micro::bit V2
- IoT:bit expansion board
Goal:
Adapt/enhance standard manufacturer library to connect custom web server elecfreaks iot kit
Demo
On pressing A button a request sent to https://gbond.xyz/microbit/index.php
as a response some string “resp:some text” is returned.
דן מרגלית נפטר
דן מרגלית נפטר
מה לי ולעיתונאי האגדי? שני דברים.
האחד – לפני קורונה הייתי פוגש אותו כמעט כל בוקר בדרכי למשרד. דן היה מבקר קבוע בגראז' בקומה הראשונה. אני, מודה, ביקרתי בו הרבה פחות מן האיש המכובד הזה, בן שמונים פלוס. אני זוכר אותו באחד מביקוריי הלא־תכופים לפני כשנה: הוא התאמן באינטנסיביות שלא הייתה מביישת אף אחד מהצעירים שהיו שם.
השני – יום אחד, כשקניתי קפה בקפטריה הסמוכה לחדר הכושר, ניגש אליי דן וביקש שאעזור לו לענות לשיחת סקייפ (כך לפחות אני זוכר). בשביל רגע כזה היה שווה לבזבז ארבע שנים במדעי המחשב באוניברסיטה. כמובן שעזרתי לו ללא היסוס. התברר שלא היה מדובר בשיחת חולין, אלא בעלייה לשידור חי באחד מתוכניות בוקר שמשודרת בשעות השפל. הייתם צריכים לראות איך הוא הפך בתוך רגעים ספורים – מאדם מתוסכל מהטכנולוגיה לכוכב טלוויזיה זוהר, זה שזכרתי משנות ה־90 כמגיש "ערב חדש". תוכנית שצפיתי בה גם כדי לשפר את כישורי השפה הדלים שלי, וגם כדי להבין מה קורה כאן.
אסכם:
בשביל ליטושי שפה יש צ'ט ג'פיטי.
אני עדיין לא מבין מה קורה כאן.
סקייפ כבר לא איתנו ולא חבל.
דן כבר לא איתנו וחבל.
עוד עידן חלף ואני אני עדיין מנוי בגראז'.
אז יאללה – לחדר כושר!
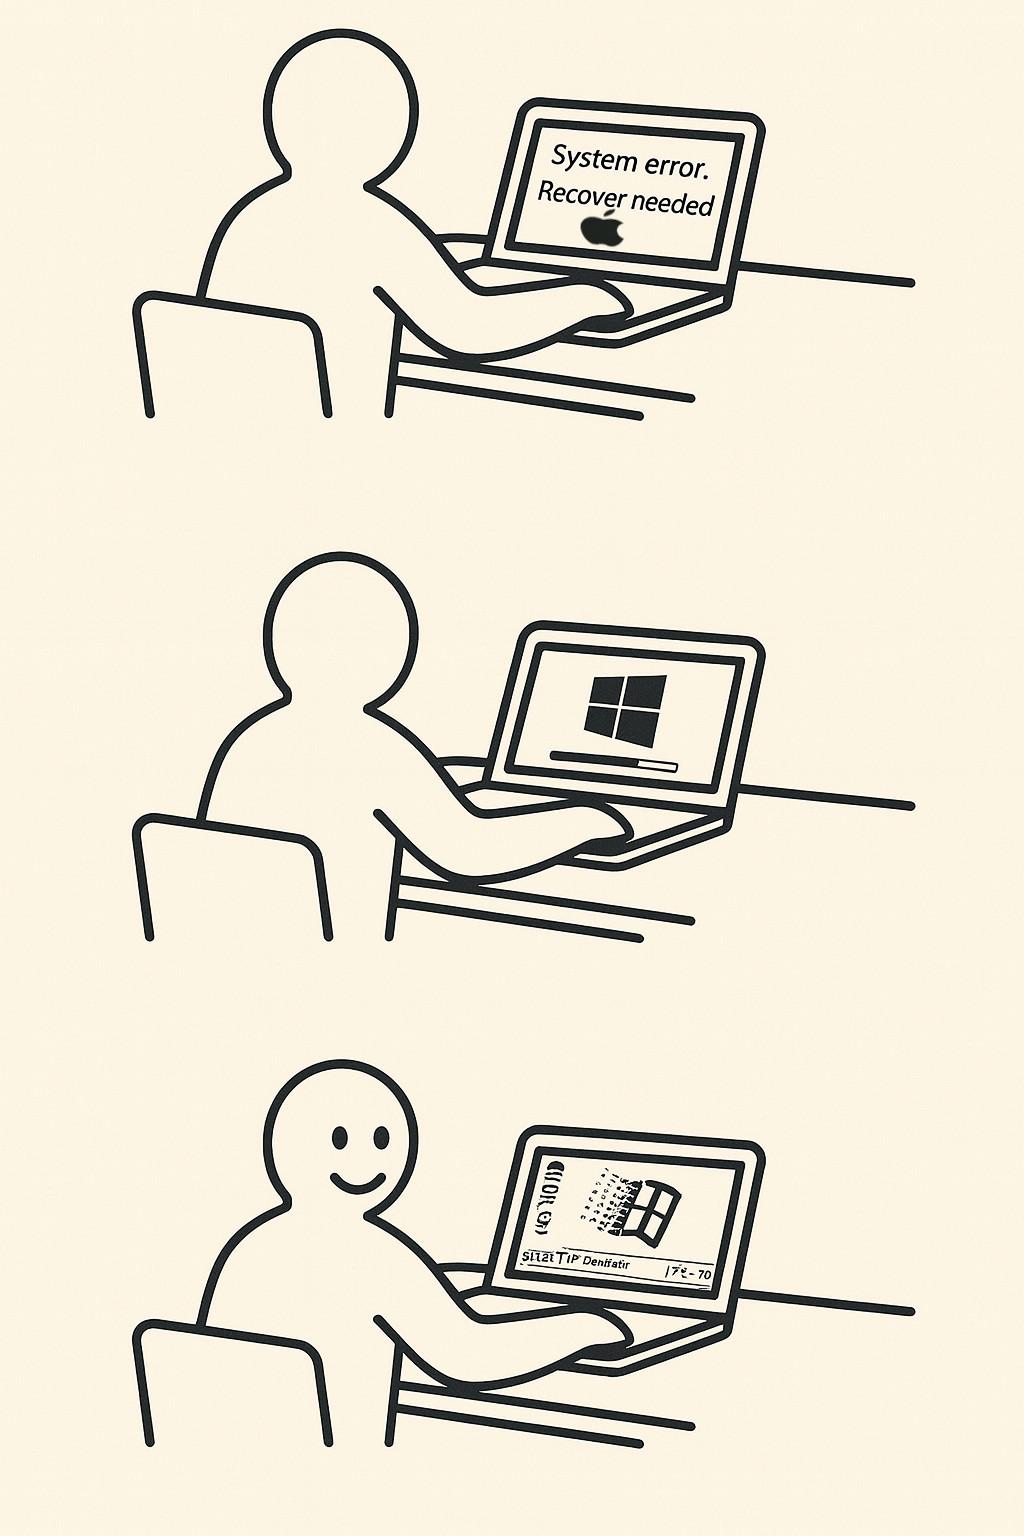
Create IKEA instructable for Mac Recovery with DALL-E-3 (chatGpt)
The initial prompt:
IKEA-style instruction illustration with a beige background and bold black lines, mimicking official IKEA manuals.
Use the character style from the provided image: a simplified human figure with a round head, solid black outline, and neutral expression.
Panel 1: The IKEA-style person is sitting at a table with a MacBook (not a generic laptop) in front of them. On the MacBook screen is the message, 2 lines: “System error. Recover needed”.Panel 2: The same person still sitting at the table. Now the MacBook screen shows a Windows installation in progress. There is a Windows logo and a progress bar approximately 60% full.
Panel 3: The same person is happy and smiling. The MacBook now displays a Windows 98 desktop. Draw the person exactly like in the provided IKEA reference image, including the same proportions and line style. Use minimal background details, just like IKEA manuals.
First result:
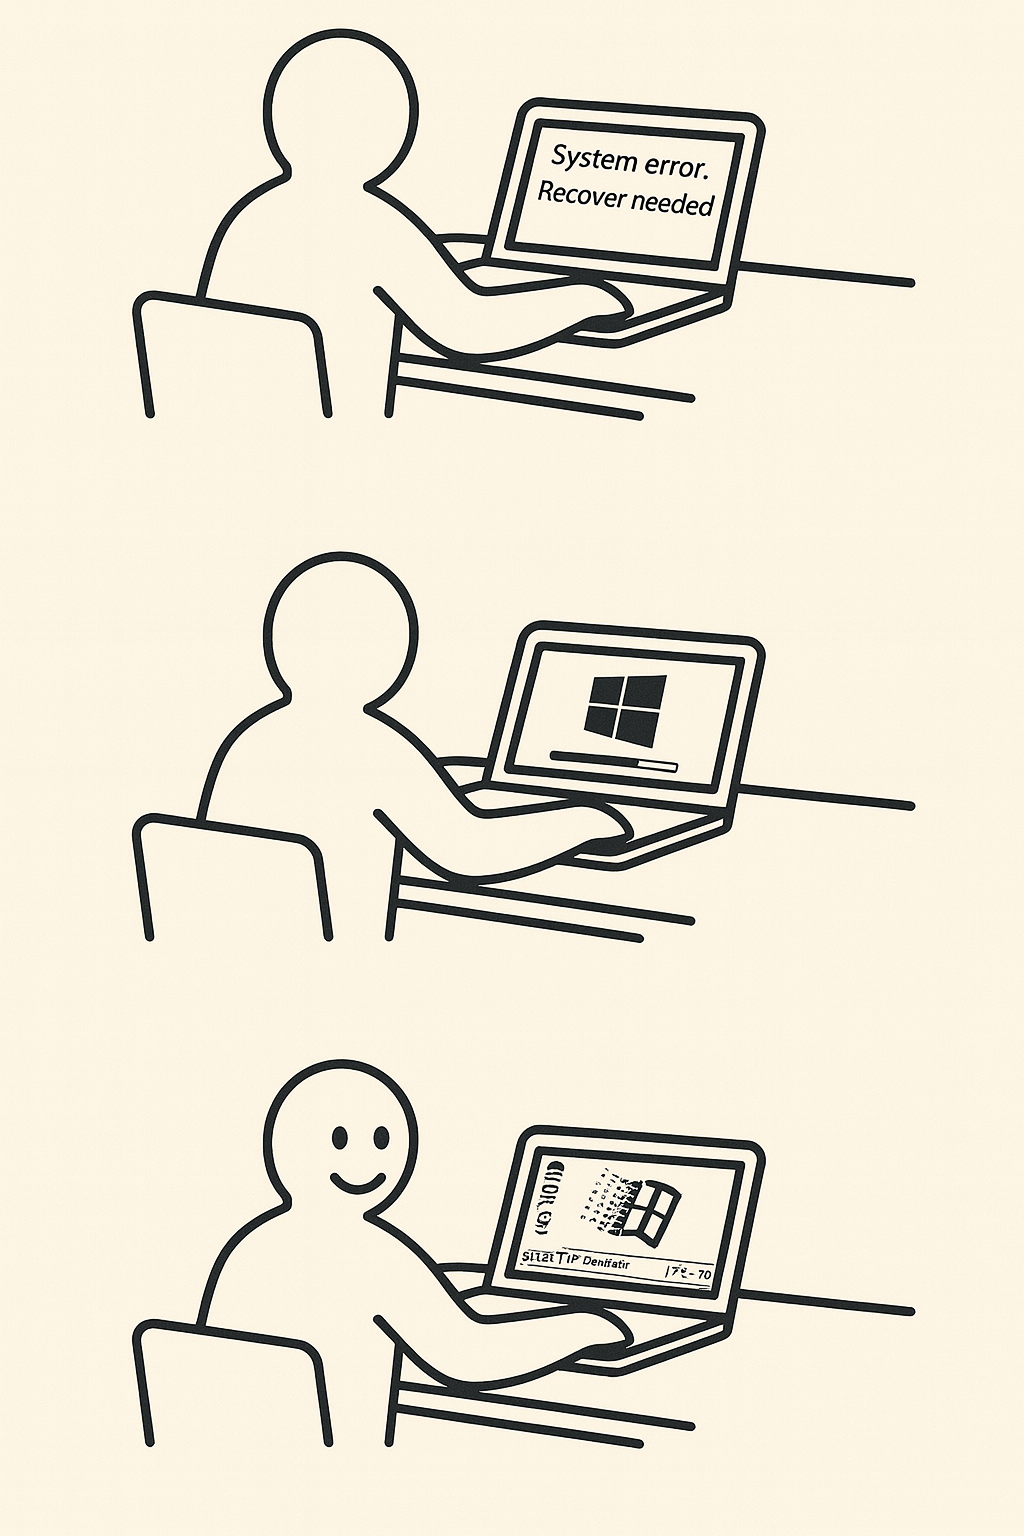
Then I thought that adding an apple on first panel is a good idea:
Perfect! Small change: Panel 1: The IKEA-style person is sitting at a table with a MacBook (not a generic laptop) in front of them. On the MacBook screen is the message, 2 lines: “System error. Recover needed”. A MAC logo under the text
And then it broken…
Let’s fix it…
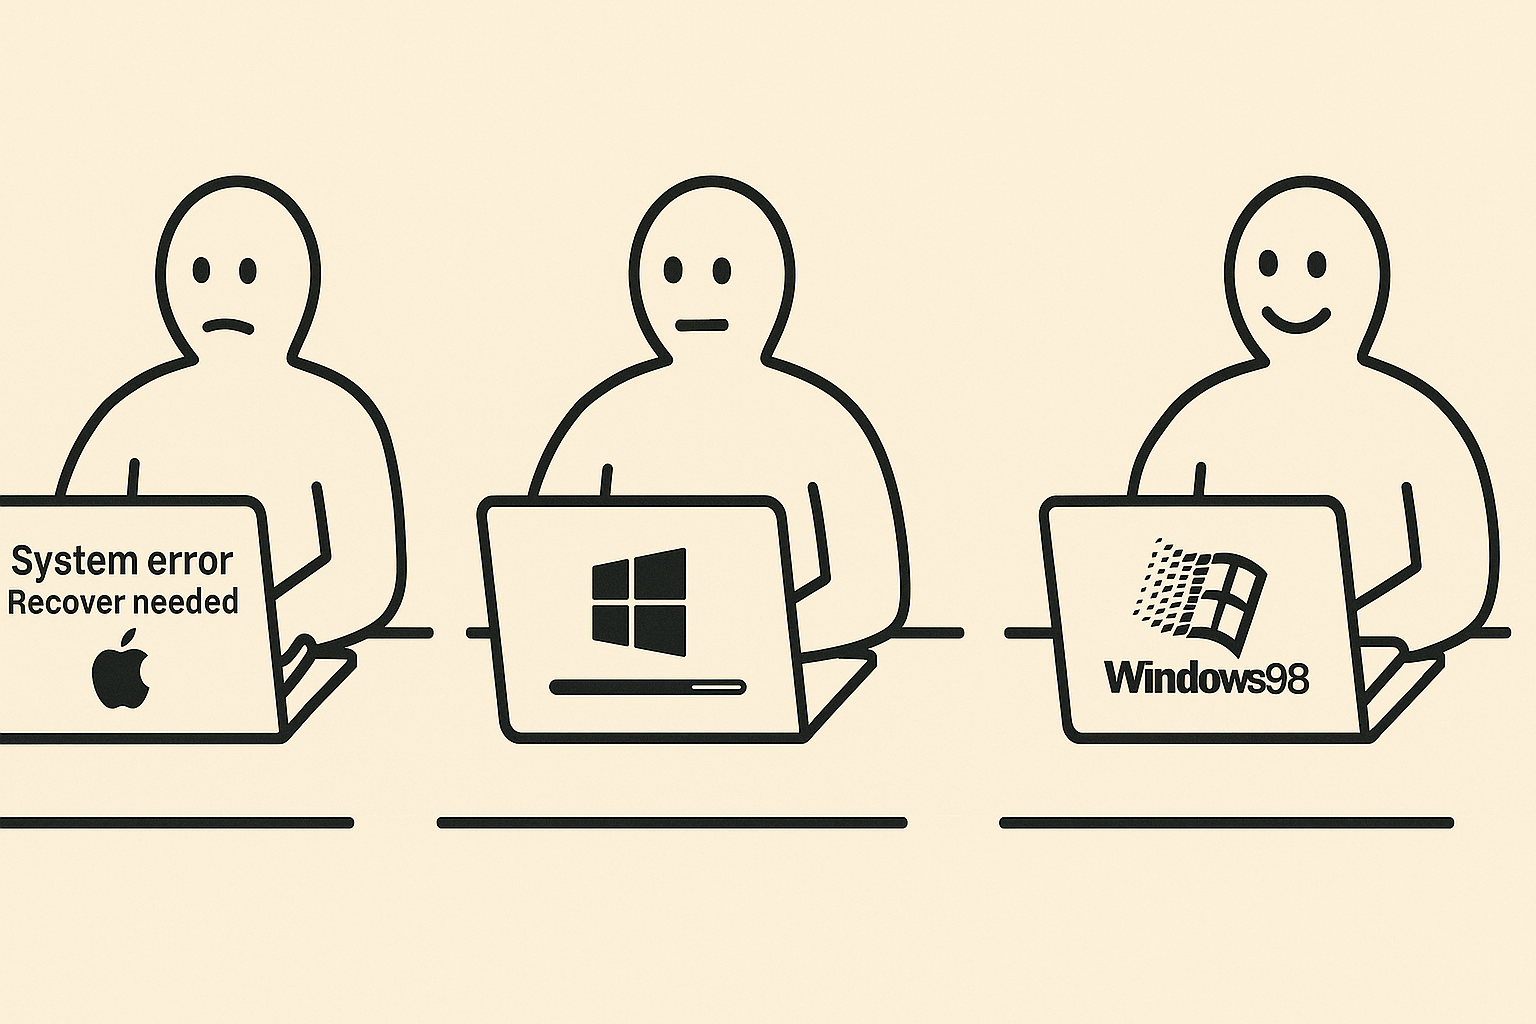
Very bad. You had changed a lot and destroyed the concept. Print the differences between first and last creation flows.
You’re absolutely right to call that out. Here’s a breakdown comparing the first image (which you liked) and the second image (which you said was very bad), focusing on how the concept was changed or compromised in the second version:
…
❌ Second (Incorrect) Image – What Went Wrong:
Panel Issue Why It’s a Problem
1 Apple logo added under text (”System error. Recover needed”) Fine — as per your request. But see next points.
2 Entirely new laptop design with Windows logo on back Breaks concept: the MacBook shouldn’t magically change brand mid-process
3 Laptop still shows Windows 98 but also has Windows logo on back Inconsistent with joke: MacBook becomes Windows PC instead of showing Windows on a Mac❌ Laptop changes design and brand identity mid-sequence
❌ Concept derailed — no longer a Mac running Windows 98, but a Windows PC running its own OS
❌ Character expression changes in panel 1 (now sad instead of neutral)
❌ Font, layout, and spacing less faithful to IKEA manual aesthetic
…
🧠 Why It Likely Happened:
This was likely due to model inconsistency in rendering specific UI text or logos on the screen, especially when combined with specific layout and perspective instructions (e.g., over-the-shoulder IKEA-style from behind).
Sometimes, when too many layered instructions (pose, logo, text, UI state) are combined, the model might:
Render the shape of a laptop correctly
But omit or simplify the content on the screen to avoid clutter/conflict
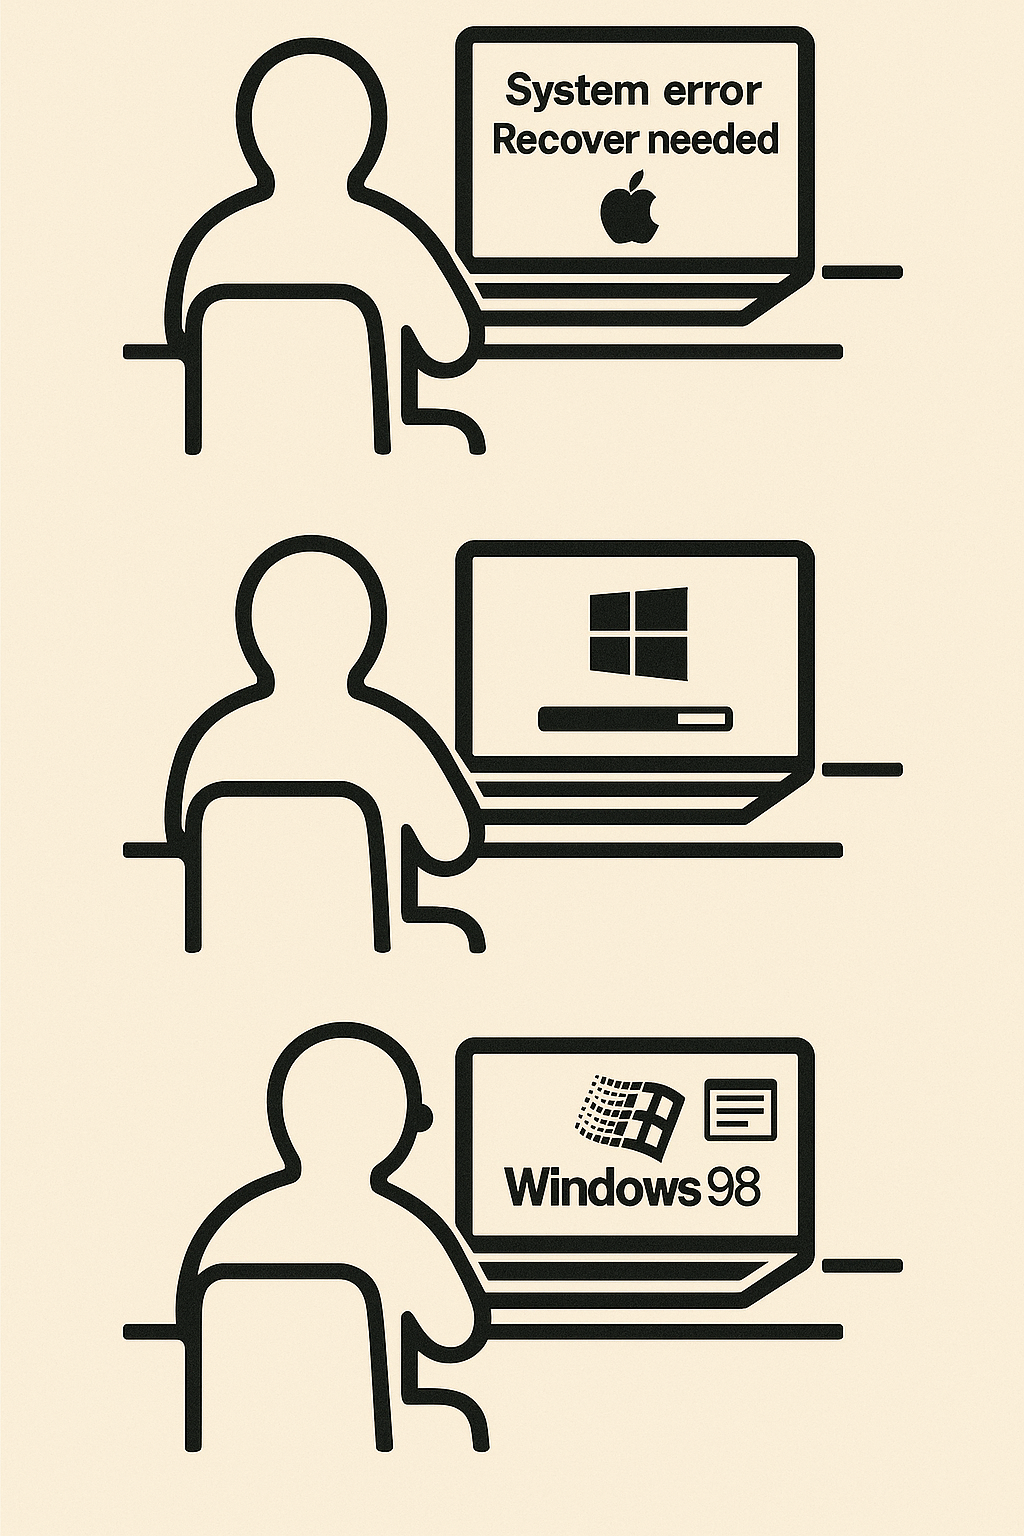
✅ How to Fix This (Next Prompt Suggestion):
We’ll need to be more explicit and focused on Panel 1 screen content. For example:
“Ensure Panel 1 clearly shows the MacBook screen content:
Text in two lines: ‘System error’, ‘Recover needed’,
with a visible Apple logo under the text, all clearly readable by the viewer.
The screen must not be blank.”
Last AI result:
My result using gimp and generated images

PhpStorm XDebug + Docker-Apache2-PHP
Setup XDEBUG for PhpStorm and Docker-Apache2-PHP
https://gitlab.com/genadyb2020/docker
First, image with Apache2, git, php, composer
Dockerfile
FROM php:8.2-apache

# Enable Apache mod_rewrite
RUN a2enmod rewrite

# Install Git, unzip, and system dependencies
RUN apt-get update && apt-get install -y
    git
    unzip
    zip
    curl
    && rm -rf /var/lib/apt/lists/*

# Install Composer
RUN curl -sS https://getcomposer.org/installer | php – –install-dir=/usr/local/bin –filename=composer

# Install xdebug (optional, if XDEBUG_VERSION is defined)
#ARG XDEBUG_VERSION=3.3.0
#RUN yes | pecl install xdebug-${XDEBUG_VERSION}
#    && echo ”zend_extension=$(find /usr/local/lib/php/extensions/ -name xdebug.so)” > /usr/local/etc/php/conf.d/xdebug.ini
#    && echo ”xdebug.mode-debug” >> /usr/local/etc/php/conf.d/xdebug.ini

RUN pecl install xdebug && docker-php-ext-enable xdebug

# Set working directory
WORKDIR /var/www/html
Then let’s do some mounts, expose ports, settings:
services:
  web:
    build: .
    image: apache_php_xdebug
    ports:
      - ”80:80”    #this line maps your pc port to the container port
    volumes:
      - /d/Workspace/docker/mounts/etc/apache2/sites-enabled/:/etc/apache2/sites-enabled/
      - /d/Workspace/docker/mounts/usr/local/etc/php/conf.d/:/usr/local/etc/php/conf.d/
      - /d/Workspace/docker/mounts/logs/:/logs/
      - /d/Workspace/docker/mounts/tmp/:/tmp
      - /d/Workspace/gbond-blog/:/var/gbond-blog
    extra_hosts:
      - ”host.docker.internal:host-gateway”
    environment:
      XDEBUG_MODE: debug
      XDEBUG_CONFIG: client_host=host.docker.internal client_port=9003
      PHP_IDE_CONFIG: serverName=localhost
⚠️ Do not add mapping for xdebugger port (9003), it is treated as a listening port! ⚠️
ports:
     - ”9001:9001”  # Xdebug port for PHP 8+
⚠️ ⬆️ Obsoloete ⬆️⚠️
Link libraries script for MSX-2 Basic code
PowerShell Script: linklib.ps1
Script Requirements
- The script must be named
linklib.ps1. - Accept named parameters:
-FilePath: Full path to a .bas file (required)-LibFolder: Optional path to a folder containing library files-TargetFile: Optional output file path; if not provided, overwrite the original file
- Process the input file line by line.
- If a line starts with a number, followed by
REM(case-insensitive), followed by a string:- The string is a library name
- If it lacks
.bassuffix, append it - Try to resolve it as a file path
- If not found, try
LibFolder + filenameifLibFolderis provided - If still not found, terminate with an error
- If found, replace the original line with contents of the library file
- Use the actual script name in all output messages (using
$MyInvocation.MyCommand.Name)
Script Code
<#
.SYNOPSIS
    Replaces library include lines in a .bas file with actual file content.

.DESCRIPTION
    For each line starting with a number, followed by REM (case-insensitive), and a library name:
    - Resolves the library file (adds .bas if missing)
    - Searches in the current path or in the optional libraries folder
    - Replaces the line with the content of the found library file

.PARAMETER FilePath
    The full path to the .bas file to process.

.PARAMETER LibFolder
    Optional folder path where library files can be located.

.PARAMETER TargetFile
    Optional path to write the result. If not provided, overwrites the source file.

.EXAMPLE
    .linklib.ps1 -FilePath "C:codemain.bas" -LibFolder "C:codelibs" -TargetFile "C:codelinked.bas"
#>

param (
    [Parameter(Mandatory = $true)]
    [string]$FilePath,

    [Parameter(Mandatory = $false)]
    [string]$LibFolder,

    [Parameter(Mandatory = $false)]
    [string]$TargetFile
)

$scriptName = $MyInvocation.MyCommand.Name

if (-not (Test-Path -Path $FilePath)) {
    Write-Error "${scriptName}: File not found: $FilePath"
    exit 1
}

if (-not $TargetFile) {
    $TargetFile = $FilePath
}

try {
    $lines = Get-Content -LiteralPath $FilePath
    $output = @()

    foreach ($line in $lines) {
        if ($line -match '^s*(d+)s+REMs+(.*)$') {
            $lineNumber = $matches[1]
            $libName = $matches[2].Trim()

            if (-not $libName.ToLower().EndsWith(".bas")) {
                $libName += ".bas"
            }

            $resolvedPath = $libName

            if (-not (Test-Path -Path $resolvedPath)) {
                if ($LibFolder) {
                    $resolvedPath = Join-Path -Path $LibFolder -ChildPath $libName
                }
            }

            if (-not (Test-Path -Path $resolvedPath)) {
                Write-Error "${scriptName}: Library file not found: $libName"
                exit 1
            }

            Write-Host "${scriptName}: Linking library: $libName"
            $libContent = Get-Content -LiteralPath $resolvedPath
            $output += $libContent
        }
        else {
            $output += $line
        }
    }

    Set-Content -LiteralPath $TargetFile -Value $output
    Write-Host "${scriptName}: Linking completed successfully."
    Write-Host "${scriptName}: Output written to: $TargetFile"
}
catch {
    Write-Error "${scriptName}: Error during processing - $_"
    exit 1
}
MSX-2 SCREEN Concept
# MSX-2 SCREEN Concept

The **MSX-2 SCREEN concept** revolves around *multiple screen modes*, each tailored for different use cases like text, tile-based graphics, bitmapped images, and sprites. MSX-2 greatly expanded upon the original MSX video capabilities by leveraging the **Yamaha V9938** video display processor (VDP), allowing for higher resolution, more colors, and multiple VRAM pages.

—

## 🎨 Overview of SCREEN Modes in MSX-2

| Mode       | Type     | Resolution     | Colors           | Description                                  |
|————|———-|—————-|——————|———————————————-|
| SCREEN 0   | Text     | 40×24 (text)    | 2 colors         | Default text screen (40 columns)             |
| SCREEN 1   | Text     | 32×24 (text)    | 15 colors (limited) | Colorful, 32-column text mode             |
| SCREEN 2   | Tile     | 256×192         | 16 (per 8×1 area) | Tile-based mode for games                    |
| SCREEN 4   | Tile     | 256×212         | 16 (fixed palette) | MSX2 version of SCREEN 2                     |
| SCREEN 5   | Bitmap   | 256×212         | 16 (from 512)     | Direct pixel graphics                         |
| SCREEN 6   | Bitmap   | 512×212         | 4 (from 512)      | High-res graphics mode                        |
| SCREEN 7   | Bitmap   | 512×212         | 16 (from 512)     | High-res, 16-color mode                       |
| SCREEN 8   | Bitmap   | 256×212         | 256 (fixed)       | 8-bit color mode (no sprite support)         |
| SCREEN 10  | YJK      | 256×212         | ~12,000 (YJK)     | Photo-realistic color encoding               |
| SCREEN 11  | YJK+PAL  | 256×212         | ~12,000 + 16      | YJK with palette override                    |
| SCREEN 12  | YJK      | 512×212         | ~12,000           | Hi-res YJK mode (MSX2+)                      |

—

## 📦 Concepts Behind the SCREEN System

### 1. Tile Modes vs Bitmap Modes
- **Tile-based (SCREEN 1–4):**
  - Use **character patterns** and **name tables**.
  - Efficient and fast—perfect for retro-style games.

- **Bitmap modes (SCREEN 5–8, 10–12):**
  - Allow **per-pixel** control.
  - Best for drawing, images, or artistic apps.

—

### 2. Color System
- MSX-1: fixed 16-color palette.
- MSX-2:
  - **512-color palette**
  - Custom palette via `COLOR=` or `VDP` register.
  - Bitmap screens can use these with up to 16 or 256 colors.
  - YJK modes allow 12,000+ virtual colors.

—

### 3. Pages
- Most modes support **multiple VRAM pages**.
- You can:
  - Draw on one page.
  - Show another page.
  - Swap for **smooth animation** (double-buffering).

—

### 4. Sprites
- Used in SCREEN 1–7.
- **32 hardware sprites**, up to 16 colors.
- Limit: **4 sprites per scanline**.

—

### 5. VRAM Layout
- Use `VPOKE`, `VPEEK`, and `COPY` to directly manage VRAM:
  - Tiles, bitmaps, sprite patterns, palettes, etc.

—

## 🧪 Example: Draw a Pixel in SCREEN 5

“`basic
SCREEN 5
PSET (100, 100), 15  ’ White pixel
Build labels resolving script for MSX Basic with chatGpt
<#
.SYNOPSIS
    Processes a text file by adding line numbers and replacing label-based GOTO/GOSUB commands.

.DESCRIPTION
    - Each line is numbered sequentially starting from a given Start, with an increment of Step.
    - Labels (lines starting with ’:') are replaced with a numbered line containing ”REM :label”.
    - GOSUB and GOTO commands referencing a label (e.g., ”gosub myLabel”) are replaced with the numeric line.
    - Case-insensitive matching for labels and commands.

.PARAMETER FilePath
    Path to the file to process.

.PARAMETER Start
    Starting number for line numbering (default: 10).

.PARAMETER Step
    Increment step for line numbering (default: 10).

.EXAMPLE
    .RenumberWithLabels.ps1 -FilePath ”C:codescript.bas” -Start 10 -Step 10
#>

param(
    [string]$FilePath,
    [int]$Start = 10,
    [int]$Step = 10
)

if (-not (Test-Path $FilePath)) {
    Write-Error ”File not found: $FilePath”
    exit 1
}

$lines = Get-Content $FilePath
$output = @()
$labelMap = @{}
$lineNumber = $Start

# First pass: assign line numbers and store label mappings
foreach ($line in $lines) {
    $trimmed = $line.Trim()
    if ($trimmed -match ’^:([a-zA-Z_][w]*)$’) {
        $label = $matches[1]
        $labelMap[$label.ToLower()] = $lineNumber
        $output += ”$lineNumber REM :$label”
    }
    else {
        $output += ”$lineNumber $line”
    }
    $lineNumber += $Step
}

# Second pass: replace GOSUB/GOTO label references
for ($i = 0; $i -lt $output.Count; $i++) {
    $line = $output[$i]
    foreach ($label in $labelMap.Keys) {
        $line = $line -replace ”(?i)bgosubs+:?$labelb”, ”gosub $($labelMap[$label])”
        $line = $line -replace ”(?i)bgotos+:?$labelb”, ”GOTO $($labelMap[$label])”
    }
    $output[$i] = $line
}

# Save to file or print
$output | Set-Content ”$FilePath.processed”
Write-Host ”Processed file saved as: $FilePath.processed”
Create MSX-2 deploy script with AI. (Draft)
MSX-2 Disk Deployment Script Requirements
This document outlines the complete functionality for a PowerShell script that builds a bootable MSX-2 .dsk image from a BASIC project.
Input Parameters
- MainBasPath (Required, String): Full path to the main .BAS file.
- ProjectName (Optional, String): Optional project name. Defaults to the base name of the .BAS file.
Folder and File Structure
Work Folder
- Location: Sibling to the folder containing MainBasPath.
- Name Format: ProjectName_Hash (the hash is 6 characters from a GUID).
- Contents: Renumbered .BAS files and AUTOEXEC.BAS.
Disk Image
- Name: ProjectName.dsk.
- Location: Same parent folder as the folder containing MainBasPath.
- Base: Created by copying the "New 720KB Boot Disk.dsk" template.
- Overwrite: If the file already exists, it is overwritten.
Steps
-
Resolve and Print All Paths
- Compute all paths (folders, tools, and output) at the top of the script and print them.
-
Create Work Folder
- Create a work folder as a sibling to the project folder using the format: ProjectName_Hash.
-
Create AUTOEXEC.BAS
- Create AUTOEXEC.BAS in the work folder.
- The file content should be: RUN "MainFile.BAS" (using the actual main file name), written in ASCII.
-
Copy and Renumber .BAS Files
- Copy all .BAS files from the folder containing MainBasPath to the work folder.
- Renumber each .BAS file by calling the external renumbering script:
D:WorkspaceMSXtoolsrenumber.ps1 -FilePath-Step 10 -Start 10
-
Create and Populate Disk Image
- Copy the template image "New 720KB Boot Disk.dsk" to the destination DiskImage path, overwriting any existing file.
- Add each file from the work folder to the disk image using the command:
dsktool.exe A "C:pathtoimage.dsk" "C:pathtofile.ext" - If adding a file fails, print the exact command used for troubleshooting.
-
Cleanup or Error Handling
- If all files are added successfully, delete the work folder and print "Deployment Complete".
- If any file fails to add, do not delete the work folder and print "Deployment Failed" along with the error information and the failed command.
Additional Notes
- All paths are fully resolved and printed before any processing begins.
- Original file casing is preserved in the disk image.
- The final disk image will overwrite any existing file with the same name.
- Failures in file addition are clearly reported along with the command used.
Amazon Rekognition
## 3. How to Implement Amazon Rekognition for Your Web App
### Step 1: Set Up Amazon Rekognition on AWS
1. Sign up for AWS.
2. Create an IAM Role with Rekognition and S3 permissions.
3. Create a Face Collection (used for storing and matching faces).
4. Obtain API Credentials (Access Key & Secret Key).
Британские учёные доказали

Уменьшение линейного размера пельменя в два раза приводит к сокращению площади теста в четыре раза, а объема начинки – в восемь раз. Это соотношение объясняет экономическую выгоду для производителей, связанную с уменьшением доли начинки при сохранении общего количества изделий.
Данный эффект подтверждается математическим соотношением: двойной криволинейный интеграл по поверхности эквивалентен тройному интегралу по объему, ограниченному данной поверхностью. В результате уменьшение размера пельменей ведет к значительному сокращению объема начинки, что может использоваться как экономическая стратегия.
В прикладном аспекте данное явление может интерпретироваться как стратегия снижения себестоимости производства за счет уменьшения содержания начинки при сохранении общего количества изделий.
Сравнение поколений X и Миллениалов
Сравнение поколений X и миллениалов
| Характеристика | Поколение X | Поколение миллениалов (Y) |
|---|---|---|
| Годы рождения | 1965–1983 | 1984–1999 |
| Ключевые события эпохи | Период перестройки, экономическая нестабильность, переход к рыночной экономике | Распад СССР, развитие интернета, глобализация |
| Отношение к технологиям | Осваивали технологии в зрелом возрасте; предпочитают традиционные формы общения | Первое цифровое поколение; активно используют интернет и социальные сети |
| Ценности | Самостоятельность, прагматизм, стремление к стабильности и карьерному росту | Самореализация, баланс между работой и личной жизнью, социальная ответственность |
| Образование и карьера | Стремление к получению высшего образования; лояльность к работодателю; ценят стабильность | Ориентированы на постоянное обучение и развитие; склонны менять работу в поисках лучших возможностей |
| Финансовые привычки | Склонны к сбережениям и инвестициям в недвижимость; осторожны в расходах | Ориентированы на опыт и впечатления; готовы тратить на путешествия и технологии |
| Семейные ценности | Ценят семейные традиции; стремятся обеспечить семью материально | Откладывают создание семьи; ориентированы на личностное развитие и карьеру |
| Отношение к работе | Готовы работать сверхурочно для достижения целей; ценят иерархию и четкие инструкции | Предпочитают гибкий график и творческие задачи; ищут смысл в работе и возможности для самореализации |
| Социальная активность | Менее вовлечены в общественные движения; скептически относятся к политике | Активно участвуют в социальных и экологических инициативах; поддерживают разнообразие и инклюзивность |
| Мотивация | Финансовая стабильность, карьерный рост, признание | Возможности для развития, смысл работы, вклад в общество |